
In today’s busy world, the more tips and tricks we have, the more efficient we can become. One way to help save time is to learn important basics of the software you use for work and school. We’ve compiled a few easy-to-grasp tips you can use the next time you power-up your version of Microsoft Excel—take a look and be sure to share your own tips in the comments section.
How to Center a Title
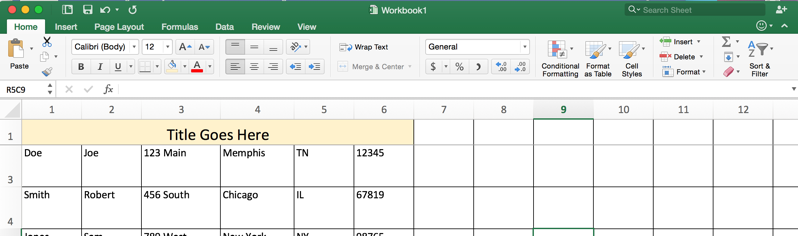
If you’re making a document with multiple columns of data, you might want to have a title that reaches across all columns, to help label what your chart’s data pertains to. This is easy to do and takes just a few clicks.
Here’s how:
- Type your desired title in the top left cell.
- Select the cells you want to use.
- In the alignment options, click Merge & Center.. This will combine all the cells you’ve selected into one and center your text.
How to Freeze a Row
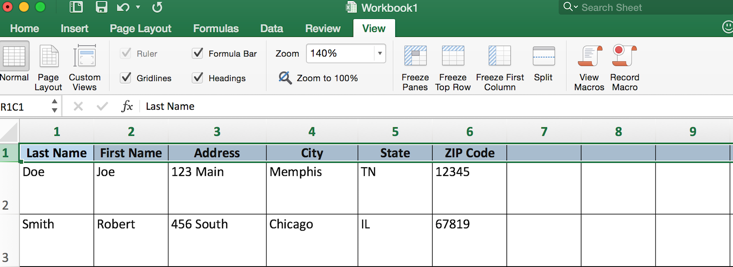
You’ve set up your rows and columns in Excel and you’re ready to make a list of your customers’ contact information. You’ve labeled your columns with categories, such as First Name, Last Name, Address, etc. Everything is going well at first as you enter row after row of information until you suddenly look up and no longer see the category names at the top of the screen. Now you have to keep scrolling up and down to make sure you’re putting your data in the correct row. Did you know there is a way to freeze that top row so you can always see it when you scroll? Follow this tip to freeze the top row of your spreadsheet so it stays put as you work.
Here’s how:
- Select the top row of your spreadsheet.
- Go to the View tab.
- Select Freeze Top Row.
- You can use this same method to freeze the first column of your spreadsheet while freeze panes –will let you freeze an area that is not the first row or first column.
How to Wrap Text
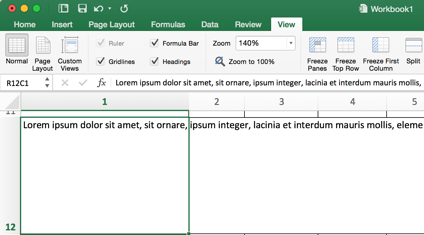
It can sometimes be frustrating working in Excel when your text keeps bleeding into the next column instead of wrapping underneath the other text in your cell. This is an easy fix.
Here’s how:
- Right-click on the cell you want to wrap.
- Choose Format Cell.
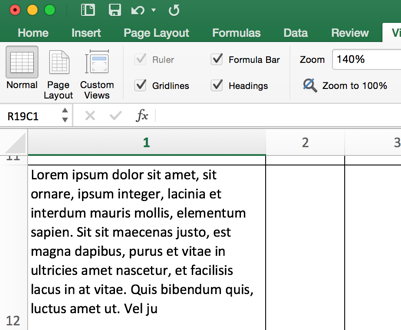
- Click the Wrap Text box in the pop-up box.
- You can also do this for multiple cells at once. Highlight an entire row or column and select Wrap Text – all of the selected cells will be formatted in this way.
BEFORE
AFTER
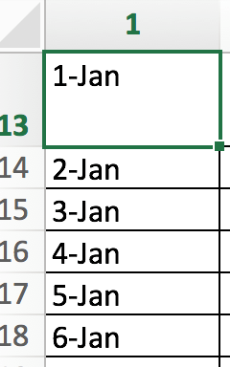
How to Autofill in Sequential Order
If you’re adding dates, numbers, or are using the alphabet, and want to list them in sequential order in a column without the work of typing them into each cell, there’s a shortcut for that.
Here’s how:
- Select the cell(s) that contain the first date/number/letter you want to put in order.
- Drag the fill handle across (or down) the adjacent cells to fill in the list.
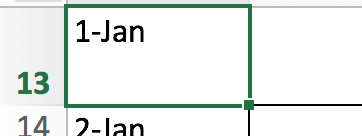
- The result is below
How to Sort a List
Sometimes you may need to sort a list alphabetically, or by ZIP code, etc. No problem.Here’s how:
To sort one column:
- Highlight the top cell in the column you want to sort.
- Then go to Home ➞ Editing ➞ Sort and Filter ➞ Sort A to Z
To sort more than one column at a time:
Home ➞ Editing ➞ Sort and Filter ➞ Custom Sort- In the Sort By box, select the first column to sort.
- Click the Add Level button.
- Select the second column to sort and repeat as necessary.
Start Using These Tips Today
Try implementing these tips and tricks the next time you use Excel. Excel is an important tool to master – for your job as well as your schoolwork. Learn more about CTU’s degree programs.
REQ1028395